Photography is now much more than taking real-life pictures. It’s a way to tell stories and share imagination through images. Many creators use composites photography to mix several photos into one clear scene.
They blend skies, backgrounds, and people to make composite photos that look creative and real. With easy-to-use tools like Photoshop or online photo compositing apps, anyone can try this style.
In this guide, we’ll explore how composites photography is reshaping modern photography and inspiring a new generation of visual storytellers.
What Is Composites Photography?
Composites photography is a creative way of blending two or more photos into one single image to tell a complete visual story. Instead of capturing one real moment, photographers mix different elements, like skies, people, and backgrounds, to build a scene that looks natural yet feels artistic. This style gives full freedom to express imagination through photos. With tools like Photoshop or other photo compositing software, even beginners can merge images smoothly and create something extraordinary. It’s often used in advertising, portraits, fine art, and fantasy projects where the goal is to make the impossible look real. In short, composite photography turns imagination into a picture, one that goes beyond what a camera alone can capture.
History and Evolution of Composite Photography
Composites photography has a long and creative past. More than 150 years ago, photographers started mixing photos to tell bigger stories. They worked in darkrooms with glass plates and lights, building one picture from many.
From Darkroom Tricks to Digital Compositing
In 1857, photographer Oscar Rejlander made a photo called The Two Ways of Life. He used about 30 different negatives to finish it. That was one of the first composite photos in history. His work showed that a picture could hold imagination, not just reality.
Those early photographers didn’t have computers, only patience. Every image took hours, but they kept going because they loved creating something new.
Rise of Photoshop and Digital Composite Images
After Photoshop appeared in 1988, everything became easier. Artists could now mix photos on a computer instead of in a darkroom. By the 1990s, digital composites were everywhere — in ads, posters, and magazines.
What made Photoshop special:
- Edits were faster and cleaner
- Colors and shadows looked natural
- Ideas became easier to express
I still remember joining two photos for the first time, one of the sky and another of a person. It looked real, and that feeling of joy still inspires me.
How AI Tools Changed Composite Art
Today, AI tools like Firefly, Luminar Neo, and Canva AI help blend photos in seconds. They find edges, fix lighting, and match colors automatically. Anyone can now try photo compositing, even on a phone.
Some artists love AI for saving time. Others miss the hand-made touch. Still, it’s clear that AI made composite photography faster and more creative for everyone.
Types of Composite Photography
1. Portrait Composite Photography
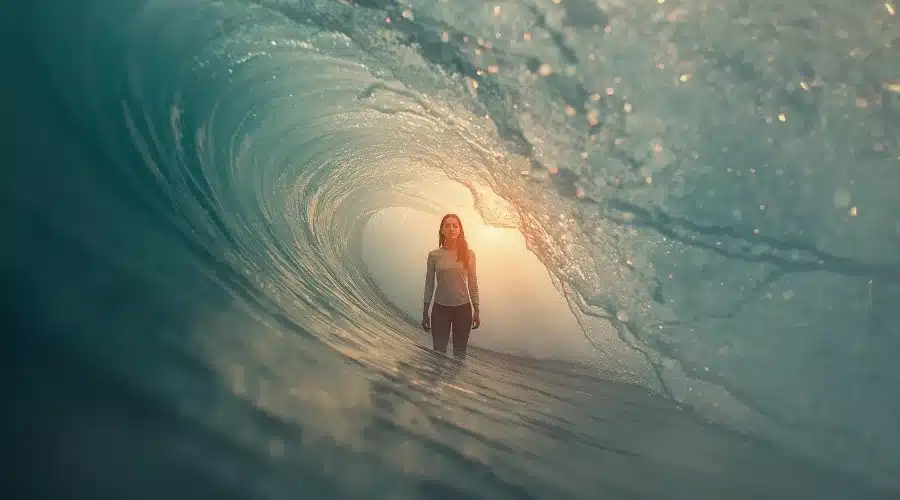
This is one of the most loved styles of composite work. A portrait composite mixes a person’s photo with creative backgrounds, colors, or effects to tell a deeper story.
For example, a simple headshot can be turned into a fantasy portrait by adding stars, smoke, or glowing lights behind the subject.
Many photographers use this method for:
- Fashion shoots to add mood or drama
- Cinematic posters to create storytelling portraits
- Personal projects to show emotion or imagination
I once made a portrait composite for a friend who loves the ocean. I placed her standing under a glowing wave, it looked dreamy but real. That’s the fun part of portrait composites, every image can show personality and mood.
2. Surreal Nature Composite Images
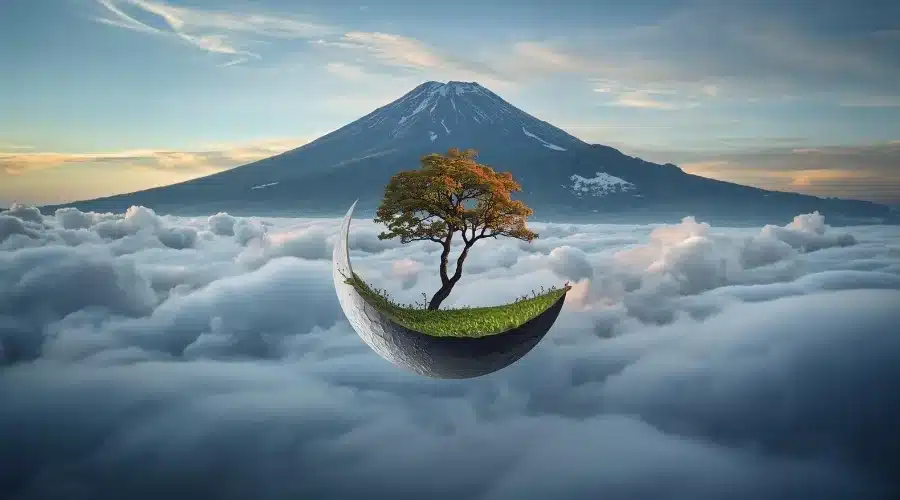
Nature composites often mix skies, mountains, forests, and oceans to make scenes that don’t exist in real life. They’re used in fine art, travel blogs, and social media.
Think of a mountain floating above clouds or a tree growing on the surface of the moon, that’s surreal composite photography. It’s perfect for expressing emotion, fantasy, and peace.
To make these, photographers blend:
- Real landscapes from different places
- Special lighting effects for atmosphere
- Color tones that match across all layers
The result feels like a dream captured inside a photo.
3. Class and Sorority Composite Photos
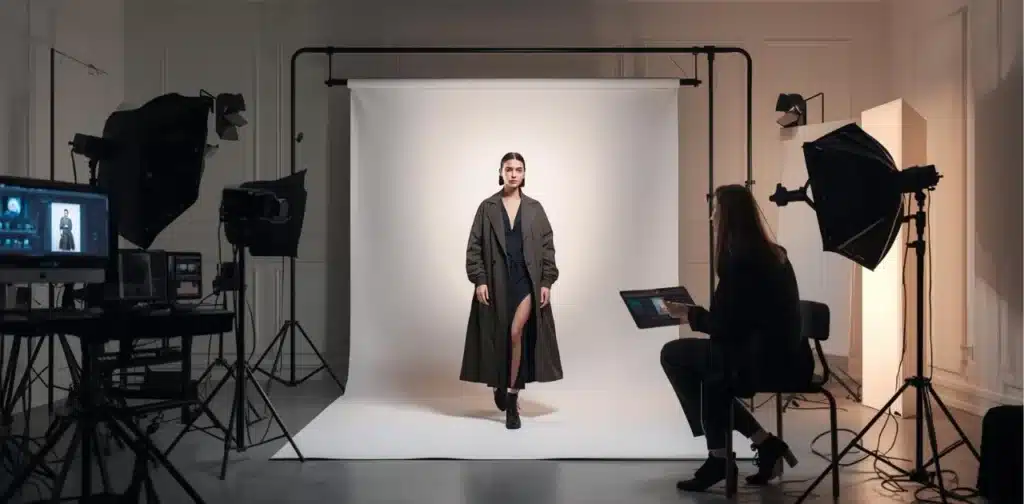
These are the traditional side of composite photography. A class composite photo shows all members of a group — like a school, college, or sorority, arranged neatly in one frame.
Each person’s portrait is taken separately, then placed together on one large image. Schools, universities, and clubs use this to preserve memories. It’s simple but important work.
Modern editors now use digital tools or AI-based templates to make it quick and clean. Even a large group photo looks organized and professional through this method.
4. Digital Composites in Advertising and Art

Advertising composites are everywhere, from product ads to billboards. A jewelry brand might shoot a ring and later place it on a shining background. A car ad might blend a vehicle into a sunset road scene for drama.
Why brands love digital composites:
- Perfect control over lighting and mood
- Ability to mix 3D elements with real photos
- Lower cost compared to full studio setups
Artists also use digital compositing for storytelling, turning everyday objects into emotional art pieces. It’s a bridge between photography and design, often seen in magazines, movie covers, and product campaigns.
5. Photoshop Composite Shots in Commercial Photography

Commercial studios depend heavily on Photoshop composites. They use them for e-commerce, fashion, real estate, and product visuals. Instead of reshooting items, editors combine parts from different photos to make one clean, attractive image.
For example:
- A jewelry photography may use one image for metal shine and another for gemstone color.
- A product photo may merge multiple lighting angles for perfect highlights.
This method saves time and ensures every detail looks flawless. Most global brands you see online, from fashion to furniture, use composite techniques to keep visuals bright, balanced, and professional.
How to Create Composite Photos Step-by-Step
Making a composite photo may look hard, but it’s easier than most people think. You only need a clear idea, a few good photos, and the right tools. Follow these simple steps to build your own creative composite.
Step 1 – Choose Your Concept or Story
Every great composite starts with an idea. Think about what you want to show or feel in the final image. It could be a fantasy scene, a product shot, or an emotional portrait.
Ask yourself:
- What message do I want to share?
- What emotion should the viewer feel?
- What type of background fits my story?
Write your idea on paper or sketch it roughly. This step helps you plan the lighting, angles, and mood before you start shooting. Once, I imagined a dancer moving through a storm of colors. Writing it down helped me plan every photo I needed , from the dancer’s pose to the flowing paint texture.
Step 2 – Capture Base and Element Images
Now it’s time to take your photos. You’ll need:
A base image (the main photo that sets the scene)
Element photos (extra parts like clouds, light flares, water splashes, or props)
Keep your lighting and perspective the same for all shots — this makes blending easier later.
If you can’t shoot everything yourself, use royalty-free stock photos that match your idea.
Tip: Use a tripod for stability and take several shots of each angle. The more options you have, the smoother your final composite will look.
3 – Use Photoshop or Compositing Software
Once your photos are ready, open them in editing software. Adobe Photoshop is the most popular, but tools like GIMP, Luminar Neo, or Canva AI can also do the job.
Start with the base image, then import your elements one by one. Arrange them using layers. You’ll notice how small adjustments, like resizing or rotating, can change the entire mood of the photo.
This is the stage where your story begins to form on screen.
Step 4 – Blend, Mask, and Color-Match Elements
Here’s where the real magic happens. Use layer masks to hide or reveal parts of your photos. Soft brushes work best for smooth transitions.
Then adjust:
- Brightness and contrast to match light between images
- Color balance so tones look natural
- Shadows and reflections to make everything believable
Take your time here. A good blend makes your composite look real. I often zoom in closely to check every edge and light direction, it’s the small fixes that make the biggest difference.
5 – Final Touches and Exporting the Composite Image
Once your image looks balanced, add final effects to polish it. Try light flares, soft color filters, or a bit of sharpening. These small touches make the composite stand out.
Then export your image in the right format:
- JPEG for web and sharing
- TIFF or PSD for print or future editing
Always save a copy with all layers, so you can return later for changes.
Tools You’ll Need: Adobe Photoshop, GIMP, Luminar, and AI Composite Makers
Here are a few trusted tools for composite work:
- Adobe Photoshop: The industry standard for precise editing and masking.
- GIMP: A free, open-source option with many Photoshop-like tools.
- Luminar Neo: Great for beginners who want AI-based lighting and color control.
- Canva AI & Fotor AI: Quick web tools for background removal and basic blending.
Each program offers something different. Try a few and see which feels most comfortable. What matters most is your idea, the tool only helps bring it to life.
Composite Photography Ideas and Examples
Composite photography offers endless ways to create powerful images. Many artists enjoy this style because it mixes imagination with real photos. Even simple elements like skies, people, and landscapes can come together to build scenes that feel emotional and meaningful.
Surreal nature composites are a popular choice. They combine different landscapes, such as oceans, skies, and mountains, to create a place that feels dreamy and calm. A beach can blend into a sunset sky. A mountain can rise from the middle of a cloud. These scenes never exist in real life, yet they feel believable when the colors and lighting match. I once created an ocean scene that faded into a starry sky. A friend said it felt peaceful and strange at the same time, and that reaction made the effort worth it.
Fantasy portrait composites offer another exciting style. A normal portrait can become magical with a few creative elements. Wings, sparkles, neon lights, or smoke can change the mood completely. Many photographers use this style for cosplay, fashion, or personal art because people love seeing themselves inside a fantasy world. A simple portrait with soft lighting can feel like a movie poster once you add the right background and effects.
Advertising composites are widely used by brands. They help products look clean, bright, and perfect. A jewelry photo might blend several images to highlight the shine. A food photo may include extra steam or light effects to make it more appealing. This method gives full control over every detail, which is why so many e-commerce brands depend on composite editing for their product shots.
Beginner compositing projects are simple and fun. Replacing a plain sky with a sunset is a great start. Adding a soft light flare to a portrait can also bring more emotion. Even mixing a silhouette with a nature scene is enough to learn the basics. These small projects help beginners understand layers, masks, and color blending without feeling stressed. You can try one of these ideas and see how it changes your confidence and creativity.
Best Software and Apps for Composite Photography
Good software makes composite photography easier and more enjoyable. Each tool has its own style and strengths. Some offer full control, while others use AI to speed up the process. The goal is to pick the one that feels right for your skill level and your creative ideas.
Photoshop compositing tools are still the most trusted choice for many photographers. Layers, masks, and blend modes give full control over every part of the image. You can hide or reveal elements with a soft brush, match colors, and build a scene step by step. Photoshop feels like a digital version of a real studio, where every tool is in your hands. I often start by adding my base photo and then slowly layering in the sky, shadows, and extra details. The control is satisfying, especially when working on complex composites.
Online composite photo makers are great for fast edits. They work inside a browser and don’t require much experience. Tools like Fotor, Pixlr, or Canva let users remove backgrounds, add textures, and blend simple layers. These platforms are helpful for beginners or anyone who wants a quick result without learning advanced techniques. Many small business owners use them to make product images look clean and sharp without hiring a designer.
AI-powered compositing tools became very popular in 2025. Apps like Firefly AI, Luminar Neo, and Canva AI can detect edges, match colors, and add lighting automatically. Some tools even offer one-click scene creation. You can upload a portrait, and the AI will place it inside a forest, a beach, or a city background. It saves time and helps beginners learn how composite photos work. Even professionals use AI tools for quick cleanup steps before doing the final polish in Photoshop.
Photoshop and AI compositors each offer something different. Photoshop gives full creative control and the highest level of detail. It is perfect for artists who want precision. AI tools bring speed and simplicity. They help with quick ideas, background changes, and basic blends. Many photographers use both. AI handles the rough work, while Photoshop adds the final art and emotion. The combination creates strong and believable composite images without wasting time or losing quality.
Tips for Realistic and Professional Composite Images
Good composite photos look real, even when the scene is completely imaginary. The secret is not in how many layers you use, but in how well each part fits together. A few simple habits can make your composites look cleaner, sharper, and more natural.
Matching light, perspective, and shadows is the first big step. Light controls how every object behaves inside an image. A bright sky will cast soft shadows, while indoor light makes shadows sharper. If the light direction doesn’t match, the whole composite feels fake. I often place a small arrow on my screen showing where the light is coming from. It helps me keep track of shadows and highlights while blending different images. Even small adjustments in brightness or contrast can change the entire mood and make the final result believable.
Using stock photos wisely can save both time and effort. Many photographers rely on stock images for backgrounds or extra elements, but picking the wrong photo can create problems. Choose stock photos that match the lighting and angle of your main image. Colors should feel similar too. If the base photo has warm tones, avoid stock photos with cold blue lighting unless you plan to color-correct. It’s also helpful to check the resolution. A blurry stock photo can ruin the final composite. Good-quality files always make editing easier and cleaner.
Keeping human elements natural, such as face swaps or expressions, is very important. People connect with faces first, so even a small mistake becomes obvious. A smile from one image may not match the lighting of another. Eyes may reflect different directions. Skin tones might not match perfectly. Try zooming in and checking small details like hair edges, shadows under the nose, and highlights in the eyes. I once swapped a client’s face into a new background, and the final image looked strange until I fixed the eye reflection. After that small change, everything looked real.
Avoiding common mistakes can instantly improve your composite work. Oversharpening, mismatched colors, and hard brush edges are some of the most common issues. New editors often blend elements too fast, leaving behind visible outlines or halos. Take your time and zoom in often. Soft brushes usually give the cleanest edges. Another common mistake is forgetting to match color temperature. A warm-toned sky and a cool-toned subject will never feel like they belong together. A small color adjustment can solve this problem easily.
Composite photography becomes easier with practice. Each project teaches something new. Try focusing on one improvement at a time and notice how your images start to feel more natural. Do you think these tips will help you in your next project?
Composite Photography in Art and Media
Composite photography is used in many creative fields. Artists and media teams love it because it helps them show ideas that feel bigger than a normal photo.
Composite art tells stories in a simple but emotional way. A single picture can show hope, fear, joy, or dreams. For example, a child’s photo mixed with a city background can feel like a story about growth or change. I once mixed a tree with a broken wall. Many people said it looked like a picture of strength. That is the power of a composite.
Many famous artists use composites. Erik Johansson makes large, surreal scenes. Brooke Shaden builds dark and dreamy portraits. Jerry Uelsmann worked with film and made composites in the darkroom long before digital tools existed. Their work shows how creative this style can be.
Ethics and copyright matter in composite work. Many composites use stock photos or extra elements. Each file must be legal to use. Always check the license before adding it to your project. It is also good to be honest when a picture is edited. Some fields, like news or documentary work, do not allow composites. Art and commercial photos have more freedom, but respect for other creators is always important.
Composite photography continues to grow. It gives people a simple way to share ideas, feelings, and stories. It offers full freedom to mix reality with imagination.
Related Concepts to Understand
Composite photography connects with many other visual terms. These ideas often sound similar, but they are not the same. Understanding the differences helps you create better work and avoid confusion.
Compositing in Photoshop vs compositing in art has two very different goals. Photoshop compositing focuses on clean edits. It uses layers, masks, and tools to make parts of different photos blend smoothly. Art compositing focuses on feelings and ideas. An artist may mix photos, drawings, colors, or textures to express emotion. Photoshop is about technique. Art is about meaning. Both are useful, but they serve different styles.
Composite vs collage vs montage is another common mix-up. A composite builds one single picture from many images. It looks smooth and natural. A collage places pictures side by side. It does not try to hide the edges. A montage shows a sequence of images to explain a story or idea. Think of a movie poster that shows several scenes from the film. A composite wants to look like one photo. A collage and a montage want to show many photos at once.
Composite view in art and media studies has its own meaning. It describes a picture that shows several angles of the same subject. Ancient drawings used this style often. For example, a face may look forward while the body turns to the side. It is not the same as composite photography, but the idea of mixing views is similar. This concept helps students understand how images can show more information than one angle.
Define composite image in both photography and graphics. In photography, a composite image joins two or more photos into one. The goal is to make it look real. In graphic design, the term can also include drawings, 3D renders, or digital textures. The final image does not need to look real. It only needs to communicate the idea. Both fields use the same word, but the purpose changes. Photography focuses on realism. Graphics focuses on design.
These simple ideas help you understand the larger world of visual creation. Each concept has its place, and knowing the difference makes your work stronger and clearer.
Frequently Asked Question ( FAQ )
Q1: What is a composite photo?
A composite photo is an image made by blending multiple photos together to create one unified, often imaginative picture.
Q2: What are composite images used for?
Composite images are used in advertising, creative art, digital storytelling, and surreal photography to visualize scenes that can’t exist in real life.
Q3: Is composite photography hard?
With practice, no. Tools like Photoshop and AI apps make compositing easier through automatic masking, blending, and background removal.
Q4: What’s the difference between photo compositing and photo editing?
Photo editing adjusts a single image, while photo compositing combines several images to make a completely new scene.
Q5: Which software is best for composite photography?
Adobe Photoshop remains the industry standard, followed by Luminar Neo, Canva AI, and web-based composite photo makers.
Q6: Can I make composite photos without Photoshop?
Yes. Online editors and AI tools like Fotor, Pixlr, and Canva AI Composite can do it easily, even for beginners.
Q7: What are some creative composite photography ideas?
Try fantasy portraits, levitation shots, surreal landscapes, or “miniature world” composites that blend scale and perspective.